Prerequisites:
(1)Students – Need to be connected to the ( Red&Yellow-Students ) network.
(2) Must have logged in to any of the Macs in the labs to confirm that the password has not expired
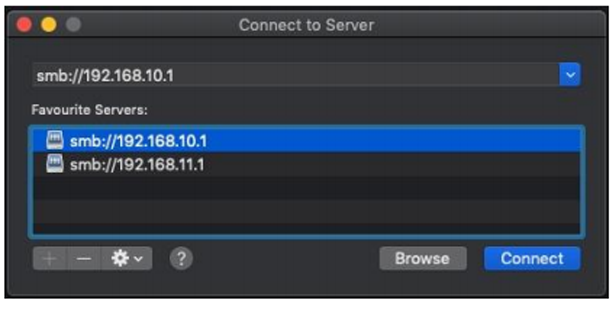
- Open the Finder and click Go | Connect to Server. In the resulting window type smb:// followed
by the IP address of the server containing the share
Type smb://192.168.11.1 “To access the location of the STUDENTS printer drivers”
2. Click Connect, and when prompted enter the credentials for the share.
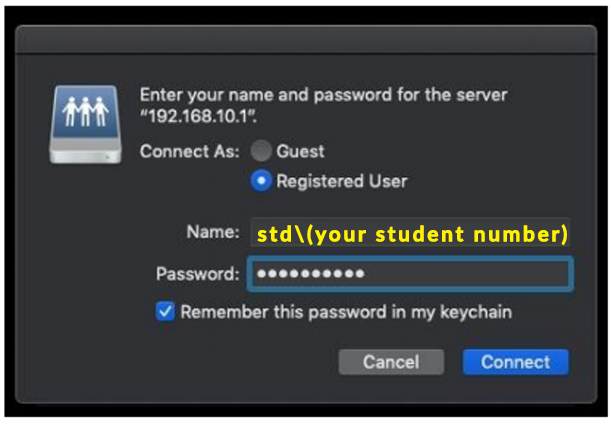
Type their “Username” std\( your student number) “Password” *, Then Click Ok.
NB: Make sure that the ‘Remember this password …’ is ticked
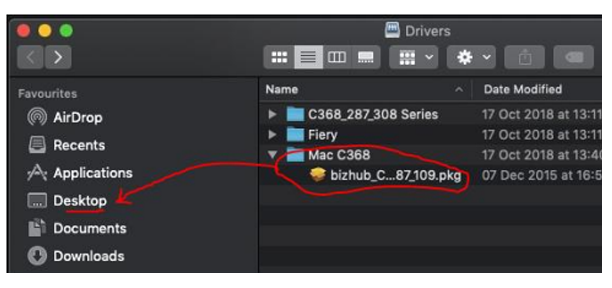
3. Select the Drivers share and click OK.

4. Select and drag the bizhub C368 driver to the Desktop and Install it in the next step.
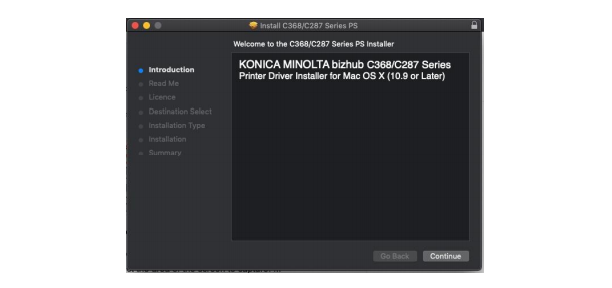
5. Continue to Click through the install dialog boxes and install the printer driver. Enter your machine
password where prompted!
6. After you’ve installed the driver, Open your System Preferences. Click on the Printers & Scanners
icon. Click the “+” sign to add the printer. A new window will open …
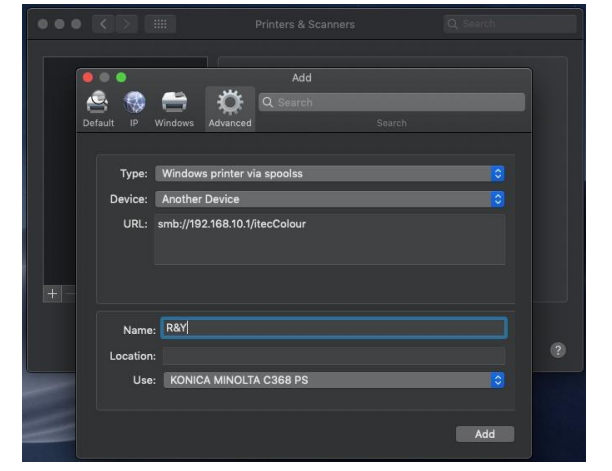
7. Click to open the Advanced button. Select and update the fields below:
If the Advanced button does not appear, right-click on the top of the toolbar and drag it on from the context menu that pops up
Type: Windows printer via spoolss
URL: smb://192.168.11.1/itecColour
Name: R&Y
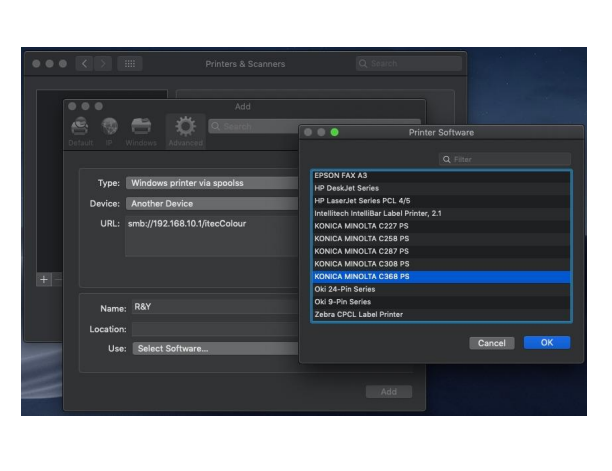
Use: KONICA MINOLTA C368 PS (Select this software driver)
8. Add the printer to your computer and it should appear in your printers list once configured.
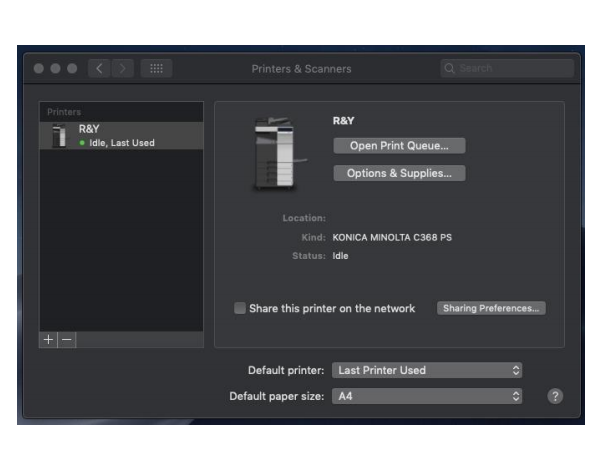
9. Print a test page